How to Root and Unroot any Android device.
Published By: Percy JamesHow to Root/Unroot your smartphone easily. I know You are the one who wants to root your android device. But You might think that it is a time-consuming process and it may need a PC or laptop. But you’re wrong. Now you can root and even unroot your smartphone with every easy and simple method. Even you don’t need Pc for this process. So today I am going to show you that how you can root and Un-root for android device easily.
Why would you Root your Android device:
Many people ask me that why should we root our Android device. So here is my answer:
When you buy a new phone, there are few limitations is it and you can’t cross that limitation. According to them, you can do too many changes in your device. for example, you can delete Pre-install apps from your phone. You can’t do too much modification on your smartphone.
The is a line and you can’t cross that line. But Once after rooting your device you’ll be able to cross that limitation line. Now you can do anything you want to do on your phone.
In simple words. I’ll become the superuser of your Android phone. you’ll get full control of your device.
Advantages:
- It makes you the superuser of your device. You can access to all file of your smartphone. You can modify anything on your phone.
- You can delete pre-installed apps from your Android device. (Normally you can’t install them until you become super user).
- You can move any application from internal memory to SDcard
- You can Flash custom ROM, custom recovery, custom kernel etc. For example, you have a KitKat version and you want to convert it to Marshmallow. So you can easily convert it into Marshmallow after rooting your device. (The best advantage).
- You can change the Boot animation of your device.
- You can share you WiFi internet with friends. in normal phones, you can only share your smartphone data connection internet with others.
- You can easily record your smartphone screen.
Disadvantages:
- There is no official method of method of rooting Android device. You can try any method(Below I will share you the easiest method with you). so you will lose your device warranty after Rooting it. because you cross the limitation line of the company by rooting your device.
- You will not receive official updates of your smartphone after rooting it or maybe you will just face troubles in it.
- Security Risk: For example, You gave a root access to any application of your device. So it mean hackers are now able to do any modification on your phone. Maybe they put some viruses on your phone or maybe they hack it.
- Risk of Bricking Device: If your phone has been corrupted, may be It will not be able to recover again(very low chances)
- There are few apps that you can’t use after rooting your phone.
How to Root your Android device:
So finally I am going to share the method with you. But Please keep all the disadvantages of this process in your mind before starting it.
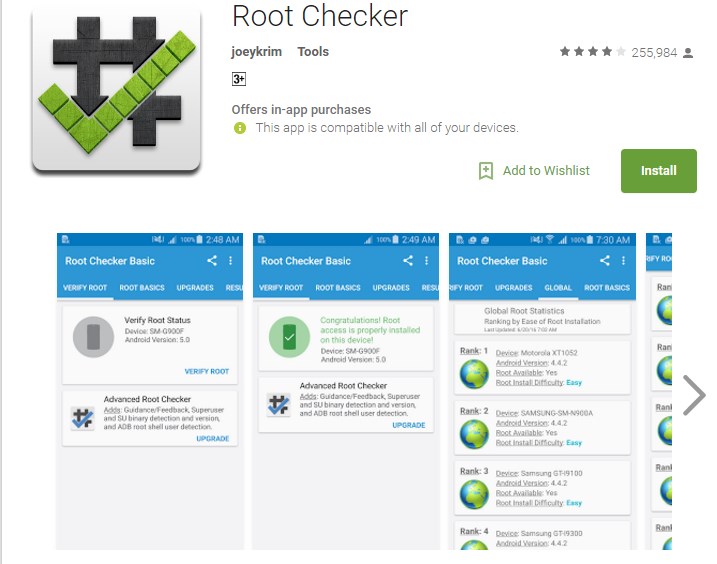
1. First of all, open play store in your phone and download “Root Checker app” from it.
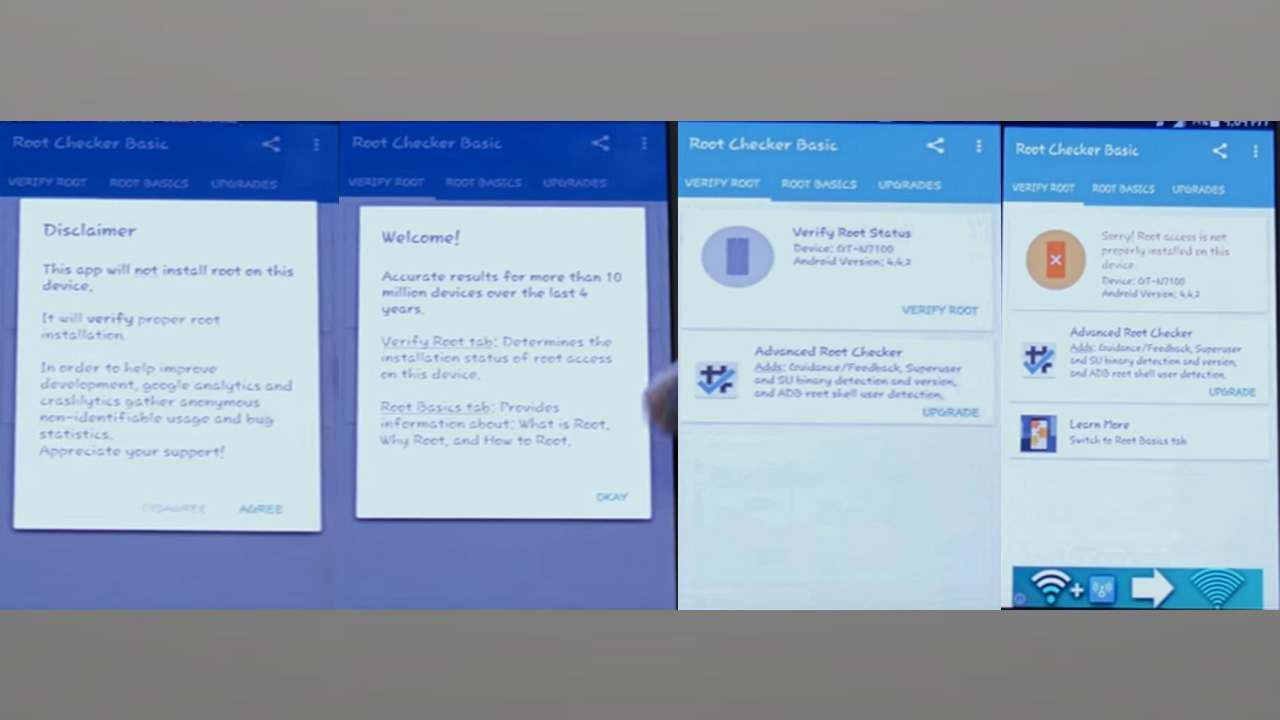
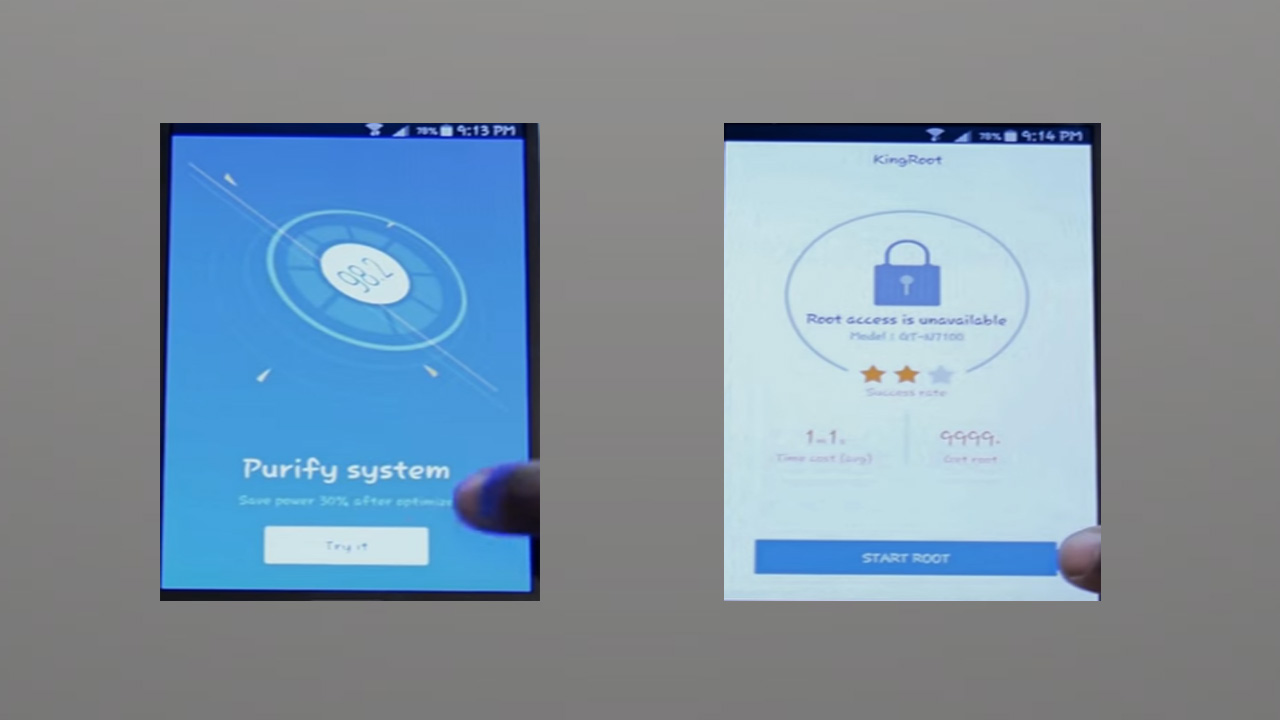
2. Now open the app after installing it. Then click on “Agree” button Then click on “OK “ button Then click on “Verify” button. After clicking on verify button, This message will be shown on your screen. “Sorry Root access is not Properly installed in this device”.
3. Now open any browser in your Phone and download “King Root application“. Open the first website that appears in Google search result and Click on “Free Download”.
4. Open the app after downloading it. Click on “Setting” button and select “UnKnown Source” from there.

5. Now click on “Next” two times and then click on “Install” to install it.

6. Now open the app and select the “Purify system” and then click on “ROOT NOW”.
So rooting will start now. it may take some time so wait for it. or maybe your device restart after completion of rooting. in that case, you don’t need to take any worry your device will be restart automatically.
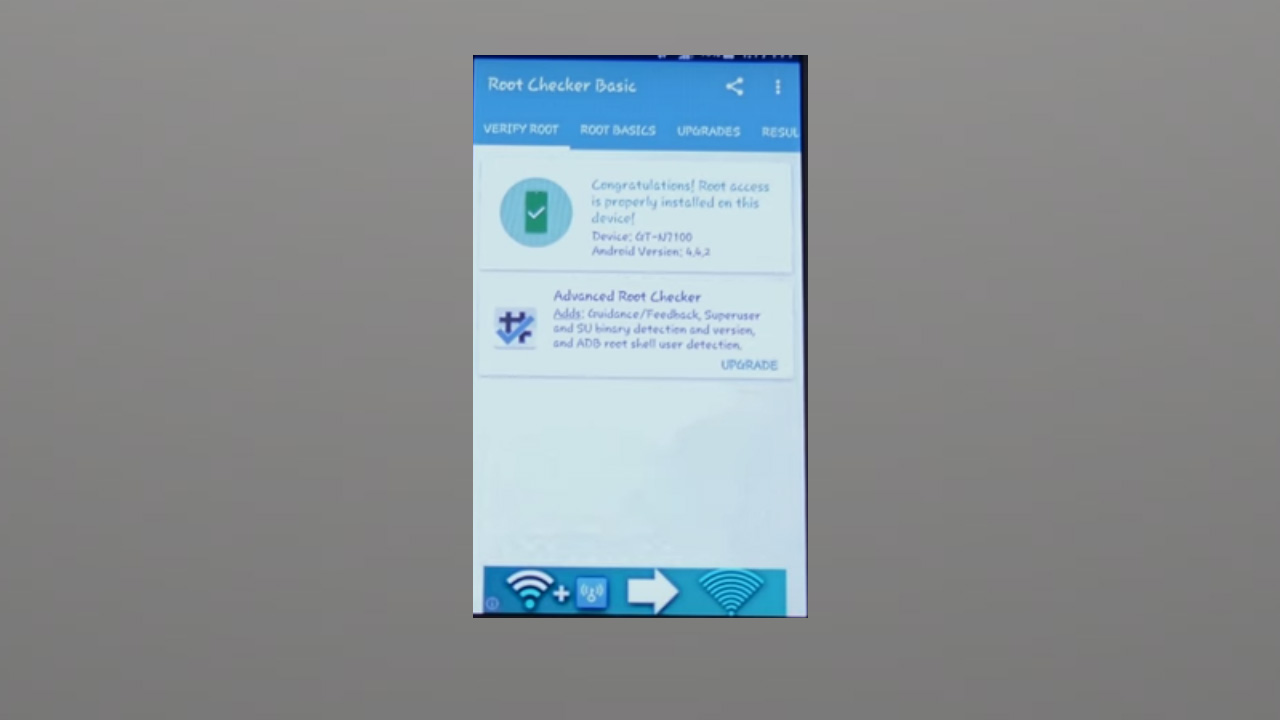
Ater completing this process. Open the “Root checker app” again and click on “Verify Now” button. After verifying your device. this message will came on the screen:
How to Unroot your Android device:
So if you want to unroot your Android device again. it’s also quite easy. Just follow the below method to unroot your smartphone again.
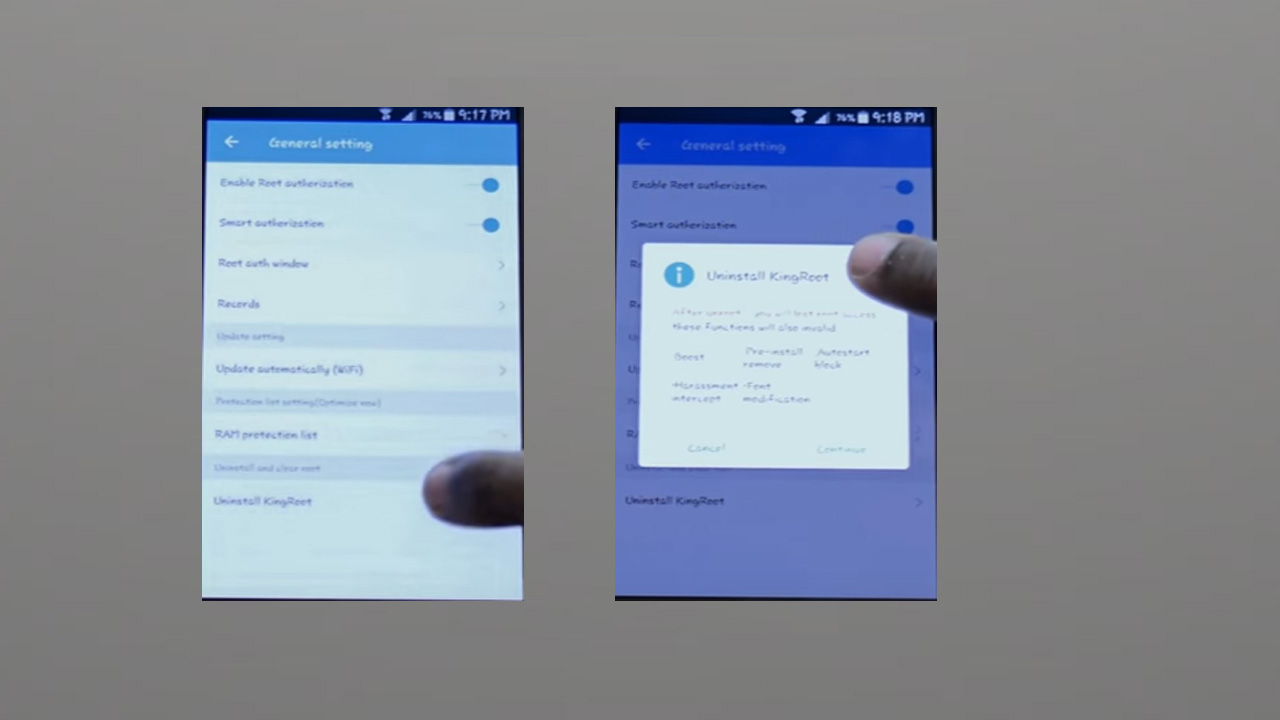
Unroot device using KingRoot:
1. Open the KingRoot app again and click on the Option(3 dots icon) located on the top right side of the app.
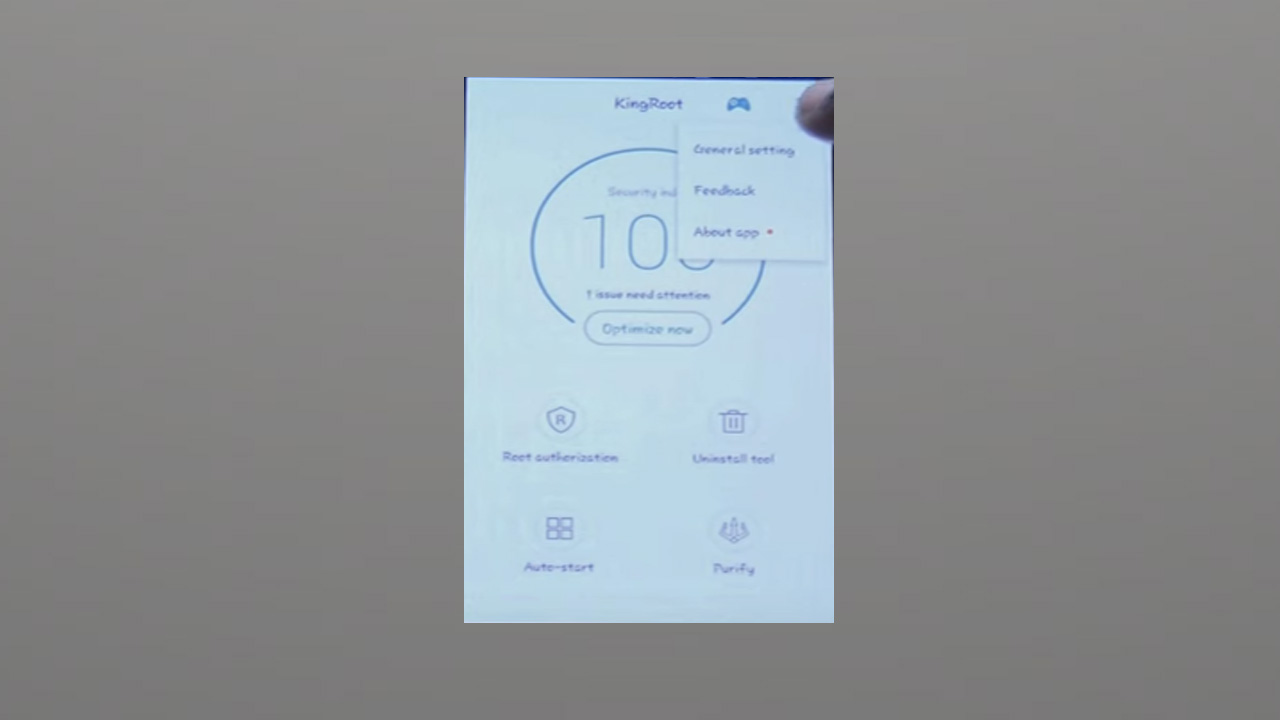
2. Then go to General setting.
3. Now click on the Uninstall KingRoot button and click on Continue button. so your phone is unrooted now.
Manually Unrooting your device:
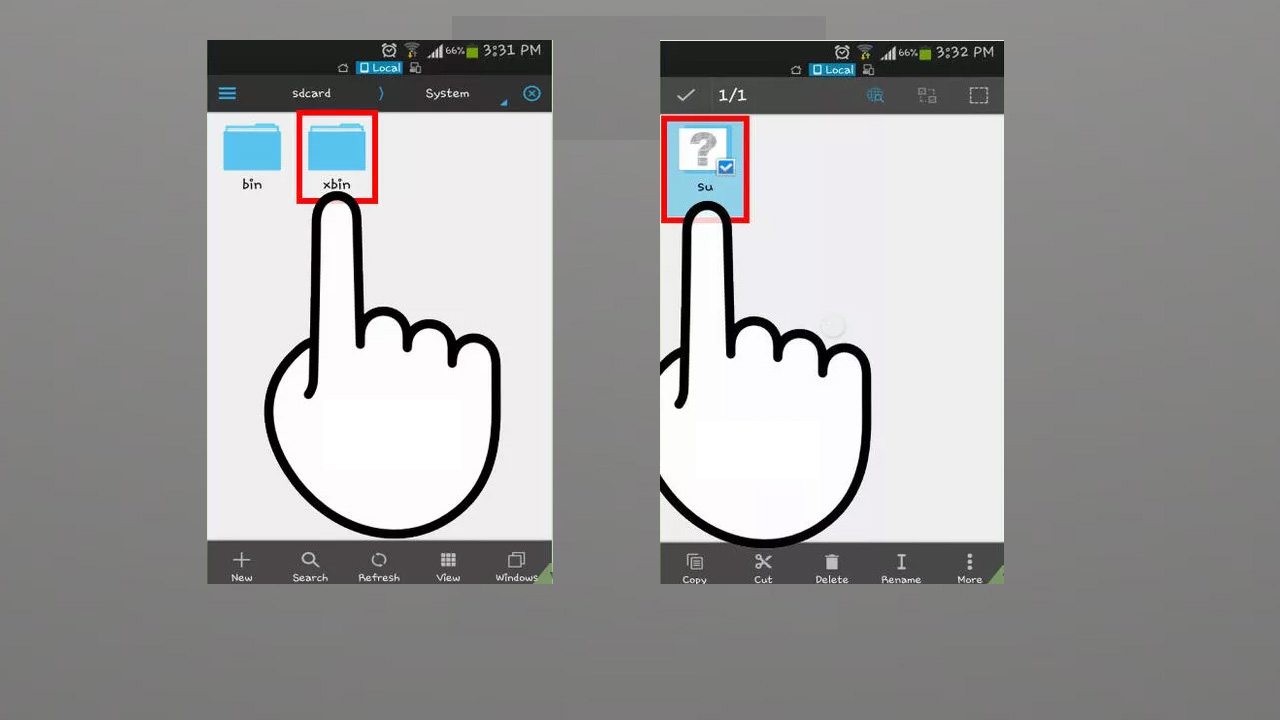
- Download any File manager from play store like Root Browser, ES File Explorer, X-Plore File Manager etc.

Picture source: Wikihow.com
2. Open file manager, find system folder and open it then click on the bin. From Bin, delete the file named su.

Picture source: wikihow.com
3. Now go back and open xbin folder and delete the su file from here too.
4. Go back again and open app folder and delete superuser.apk file from here. Now restart your device and your phone is unrooted again.

To check that your smartphone is rooted and unrooted. open the root checker app and check it easily.